If, like me, you are a cold sleeper, then trying to keep warm while backpacking and camping in the winter months is a challenge. It seems such a waste of valuable hiking time and being in nature if you miss out on those colder months. Hiking in the winter brings a completely different experience to the party. The autumn colours, the frosty ground shimmering in the mornings, the low sunsets are stunning and if we are lucky enough to have snow then that just takes the beauty of it all to another level.
I suffer from Raynaud's Disease which affects your circulation. This horrible disease is hereditary and causes some areas of your body, like your fingers and toes, to change colour when you're cold or stressed. Even on a chilly summer morning, it takes a while for my body to warm up, so winter hiking can often be extremely painful. The way to combat Raynaud's Disease is to keep warm and relaxed. The relaxing bit is difficult when you are in pain, so my focus has always been to keep warm.
In this blog, I am going to share with you XX ways to keep warm when winter hiking and camping (especially sleeping in a tent!). Some of these tips you may find a bit strange, but they do work!
#1 – Upgrade your tent!
I am a lover of the Lanshan 2, which is a lightweight backpacking tent. Yep, it weighs around 2lbs and you erect it with your walking/trekking poles. This year I purchased a new Lanshan, which has a 4 season inner, rather than a regular 3 season mesh. I will put a video together to explain the main differences between the two tents, but my green tent is now for winter hiking, and my white one is for the summer months. Take a look at your tent. Double-wall tents are the way to go if you live in the UK, especially if you are camping during the colder months. They produce less condensation and are generally warmer.
#2 – Utilise Heat Pads
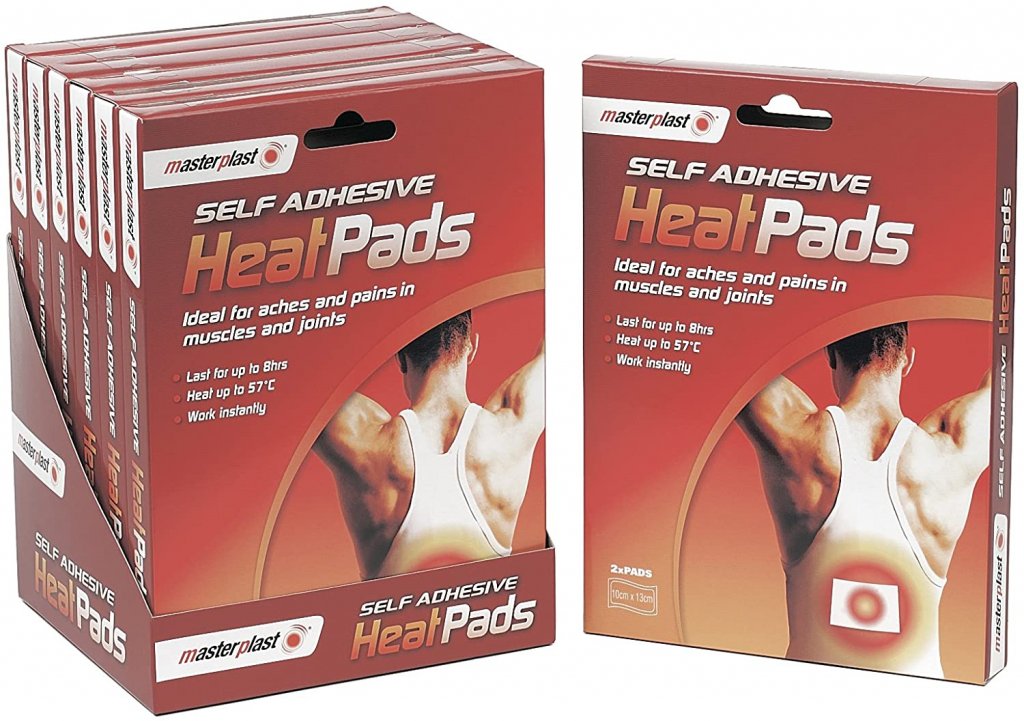
With my tent all set up, my sleeping pad inflated and my down quilt set to breathe and loft, I throw in two heat-pads into my quilt. The ones I use are for the lower back (not little hand warmers). I put one in the foot box area, and another in the middle. They have a sticky back, and when I climb into my quilt at night, I transfer the heat pad from the bed to the inside of my thigh (against the main artery), where it stays for the duration of the night. The pads that I use last up to 12 hours. In the morning, I remove them from my body and foot box and transfer them into my walking boots. There is nothing better than putting your feet into warm toasty walking boots when starting out on a morning hike.

I prefer the larger heat pads rather than the hand warmers or foot warmers. These are the ones I use (they do last up to 12 hours). Amazon link is here.
#3 – Purchase a sleeping pad with a high R-rating
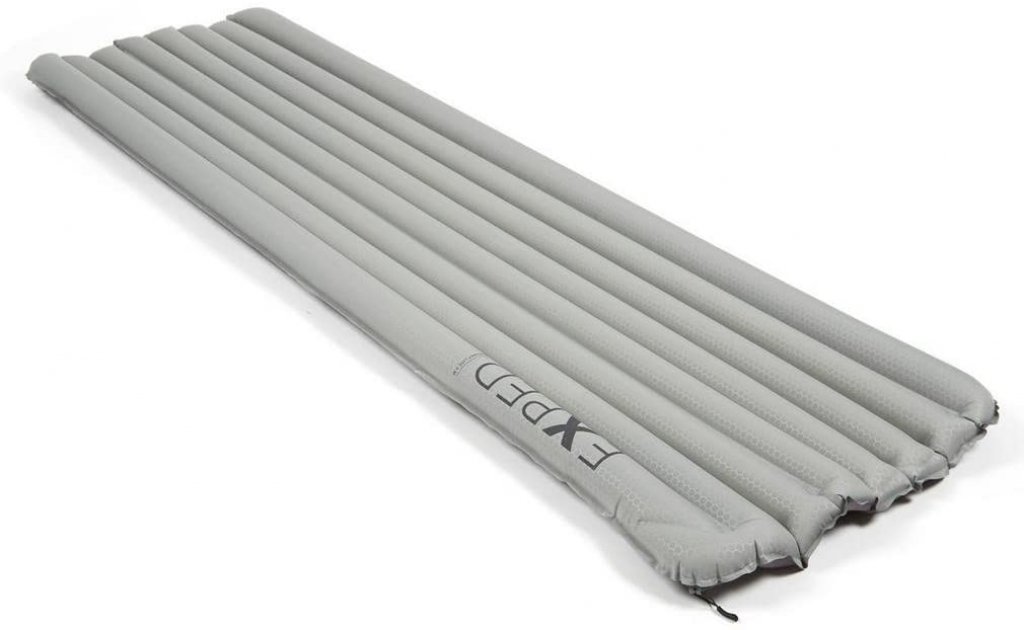
I never knew about R-rating's until I started researching sleeping pads. I remember testing different pads out in Go Outdoors (much to my daughter's disgust as I was laying on the different mats in the shop!). My research told me that even if I had a super-duper winter sleeping bag if I was not protected from the ground then all my body heat would be sucked into the earth. Most sleeping pads are rated from 0-7 (seven being the warmest and something you would use in the antarctic!). I didn't like the lightweight but warm Thermarest air pads as it sounded like I was sleeping on a packet of crisps! I opted for a 4.1 rated Exped LitMat, which is extremely light, and the warmth comes from the down feathers inside. This is a great pad, and money well spent!
Side note: I also put one of those lightweight foil blankets underneath my sleeping pad. I have no idea if it makes a difference, but in my mind it does!

Exped Downmat Lite has a temperature rating of -12 degrees and an R-value of 4.1 which is fantastic for those chilly winter nights. Weight: c920g
Amazon link here.
#4 – Don't sleep with all your clothes on!
This may sound crazy, but I watch videos on YouTube and people are layering up, inside their sleeping bags or quilts to keep warm. A down sleeping bag is only effective if it can radiate your heat back to you. If you stifle your body heat then the bag/quilt is unable to do its job. I sleep with my thermal underwear on and a beanie to keep my head warm and toasty. If I do get extra cold, then I will lay my down jacket over me (inside my quilt), and my down booties are the best invention ever!
#5 – Eat something just before you go to bed.
We have lived in a culture where we think that it is bad to eat before bed, but in the world of backpacking and hiking it is a well known tactic to keep warm during a cold night. If you have eaten just before you go to bed then you body needs to get to work to digest the food. I usually eat something that releases energy and is slow burning such as a porridge oat bar, banana, or a pasta pot. Give it a try if you are a cold sleeper, it really does make a difference.
#5 – A hot water bag!
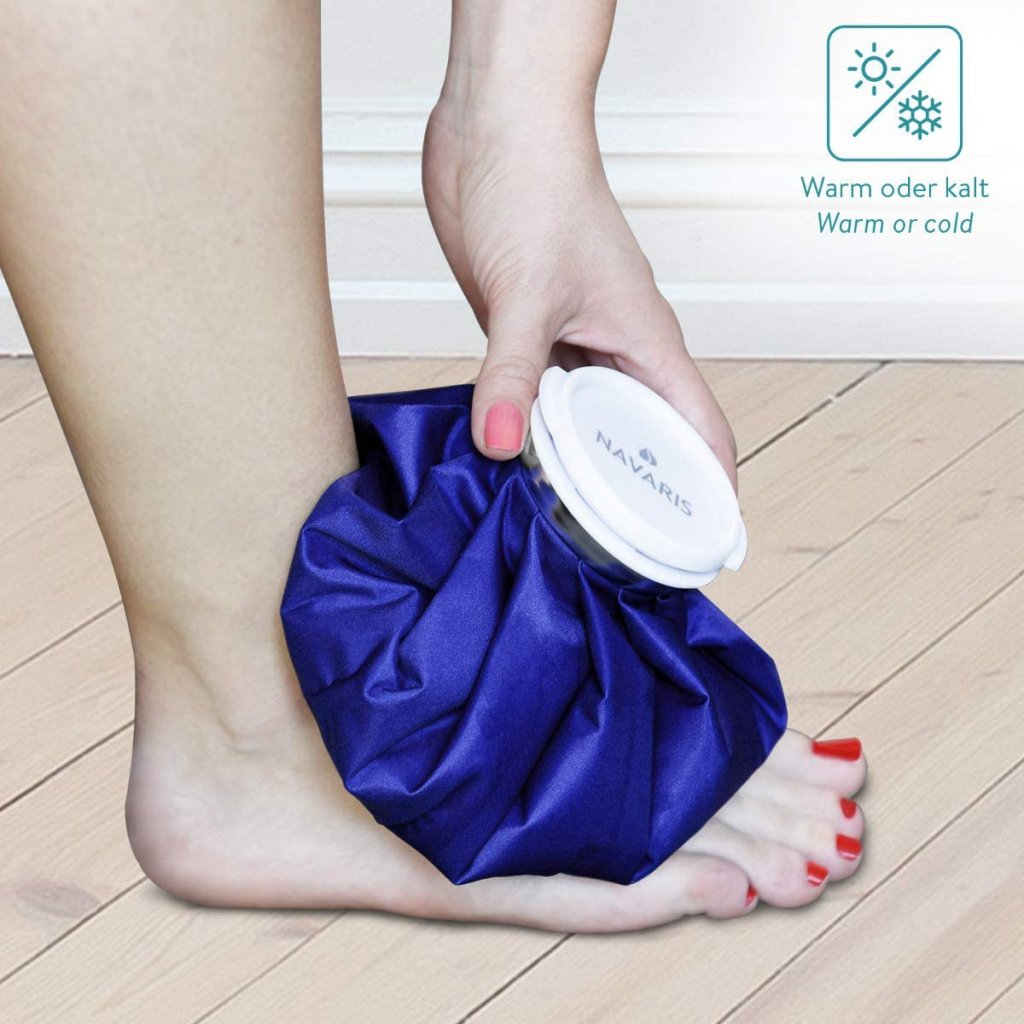
In addition to the heat-pads, I also use a hot water bag for those really cold nights. These work in the same way as a hot water bottle, but they pack up really small, are lighter than a rubber bottle and are much more comfortable to cuddle. For the weight conscious hikers, you may prefer to use a nalgene bottle which doubles up as your water bottle during the day. Keep a sock around the bottle so that it feels a bit softer.
Side note: these bags are also brilliant to fill with cold water when needed reduce swelling. It's difficult to find frozen peas on the trail!

I use the Navaris bags (they come in packs of two, but I only use one on the trail).
Amazon link is here.
#6 – Use a winter sleeping bag or quilt
Using a quilt in a tent in the winter may sound a bit crazy, but I absolutely LOVE my quilt. A quilt or sleeping bag only has insulation benefits when it is allowed loft, which is why you never want to put a blanket on top of you. It is also the reason that setting up your sleep system should be one of your first chores when you get into camp. With a sleeping bag, you are compressing the underneath of the bag when you sleep, therefore it has zeco insulation beneits for you. The only benefit is that it may keep out drafts if you toss and turn in your sleep.
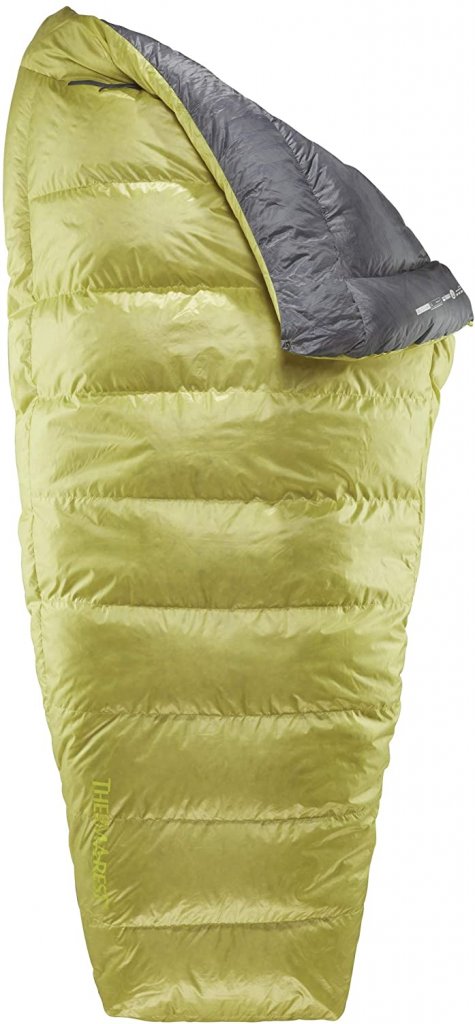
The quilt that I have has weighted baffles down the side, and also comes with pad straps (so it straps to your sleeping pad). Coupled with a fitted sheet, it works in a similar way to having a duvet on your bed at home. With a quilt I don't get tangled up, I can stick my foot or leg out of the side if I get too hot, and it has a cinch clip and baffle around the neck area, so I can snuggle down into the quilt. It's fab!
When you are looking at sleeping bags or quilts, do not be fooled by the temperature rating. Take note of the “Comfort rating” more than any other rating on the bag. In my opinion, a winter bag for the UK will ideally need to have a comfort rating of 20° faranheit or -6° celsius as a minimum.

This is the quilt that I am currently using from Thermarest. It is called the Corus quilt. They are quite expensive (£180) but worth the investment and I have slept brilliantly since using it.
If you are Googling this quilt then make sure that you select the right temperature rating as there are a variety to choose from. The only negative is that they are all the same mustard colour.
Amazon link is here for the 20°/-6° bag.
Summary
I hope you found these tips useful for those of you who are cold sleepers. Have a fantastic winter and don't let the cold weather stop you from enjoying the great outdoors.
